
Do you want to reward your furry friend with tasty treats, but don’t fully trust the ones kept on store shelves?
I completely understand. You never really know what’s inside those packaged treats or how old they might be.
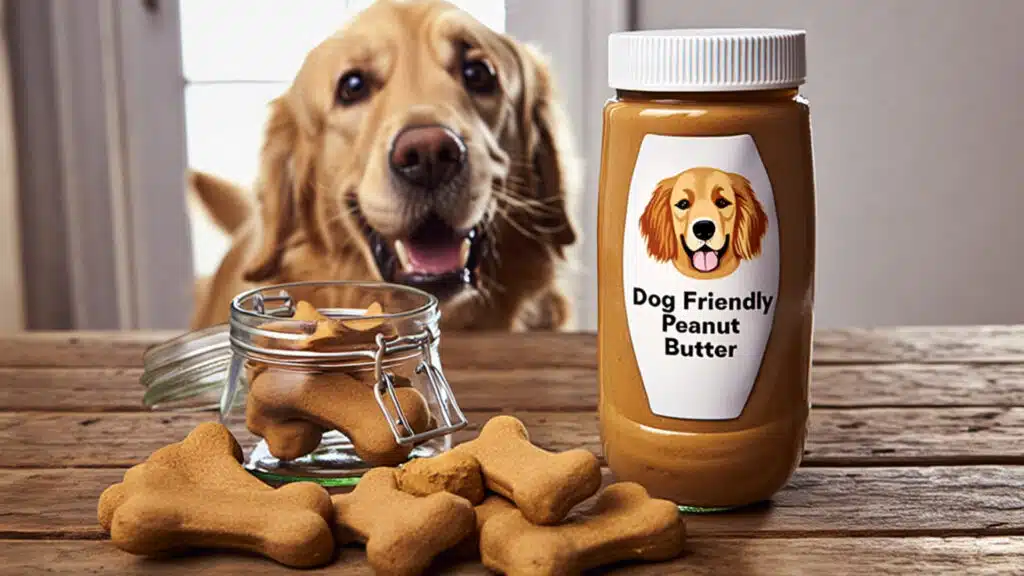
I’ll help you make your own peanut butter dog treats at home using just three simple, safe, healthy, and affordable ingredients.
These 3-ingredient peanut butter dog treats are easy to prepare, and your dog will absolutely love them. You can customize them with your dog’s taste and shape preferences.
Making treats at home also builds a stronger bond when you serve them yourself and see your pup wag happily, waiting for more.
What Are 3-Ingredient Dog Treats?
Just as the name suggests, three-ingredient dog treats are made using only three simple, healthy, and safe ingredients that your dog will love.
They usually include peanut butter, flour, and a soft fruit or vegetable such as banana, pumpkin, or sweet potato.
Peanut butter adds protein and healthy fats that give your dog lasting energy and support strong muscles.
The fruit or vegetable provides natural flavor, vitamins, and moisture, making every bite tasty and nutritious.
The flour helps bind everything together, making the dough easy to roll and bake while supporting digestion.
No extra ingredient is required, and these treats are far healthier than many store-bought options filled with preservatives or artificial flavors.
The best part is that you made them yourself, giving you complete trust and satisfaction in what your furry friend is eating.
Ingredients and Tools Required
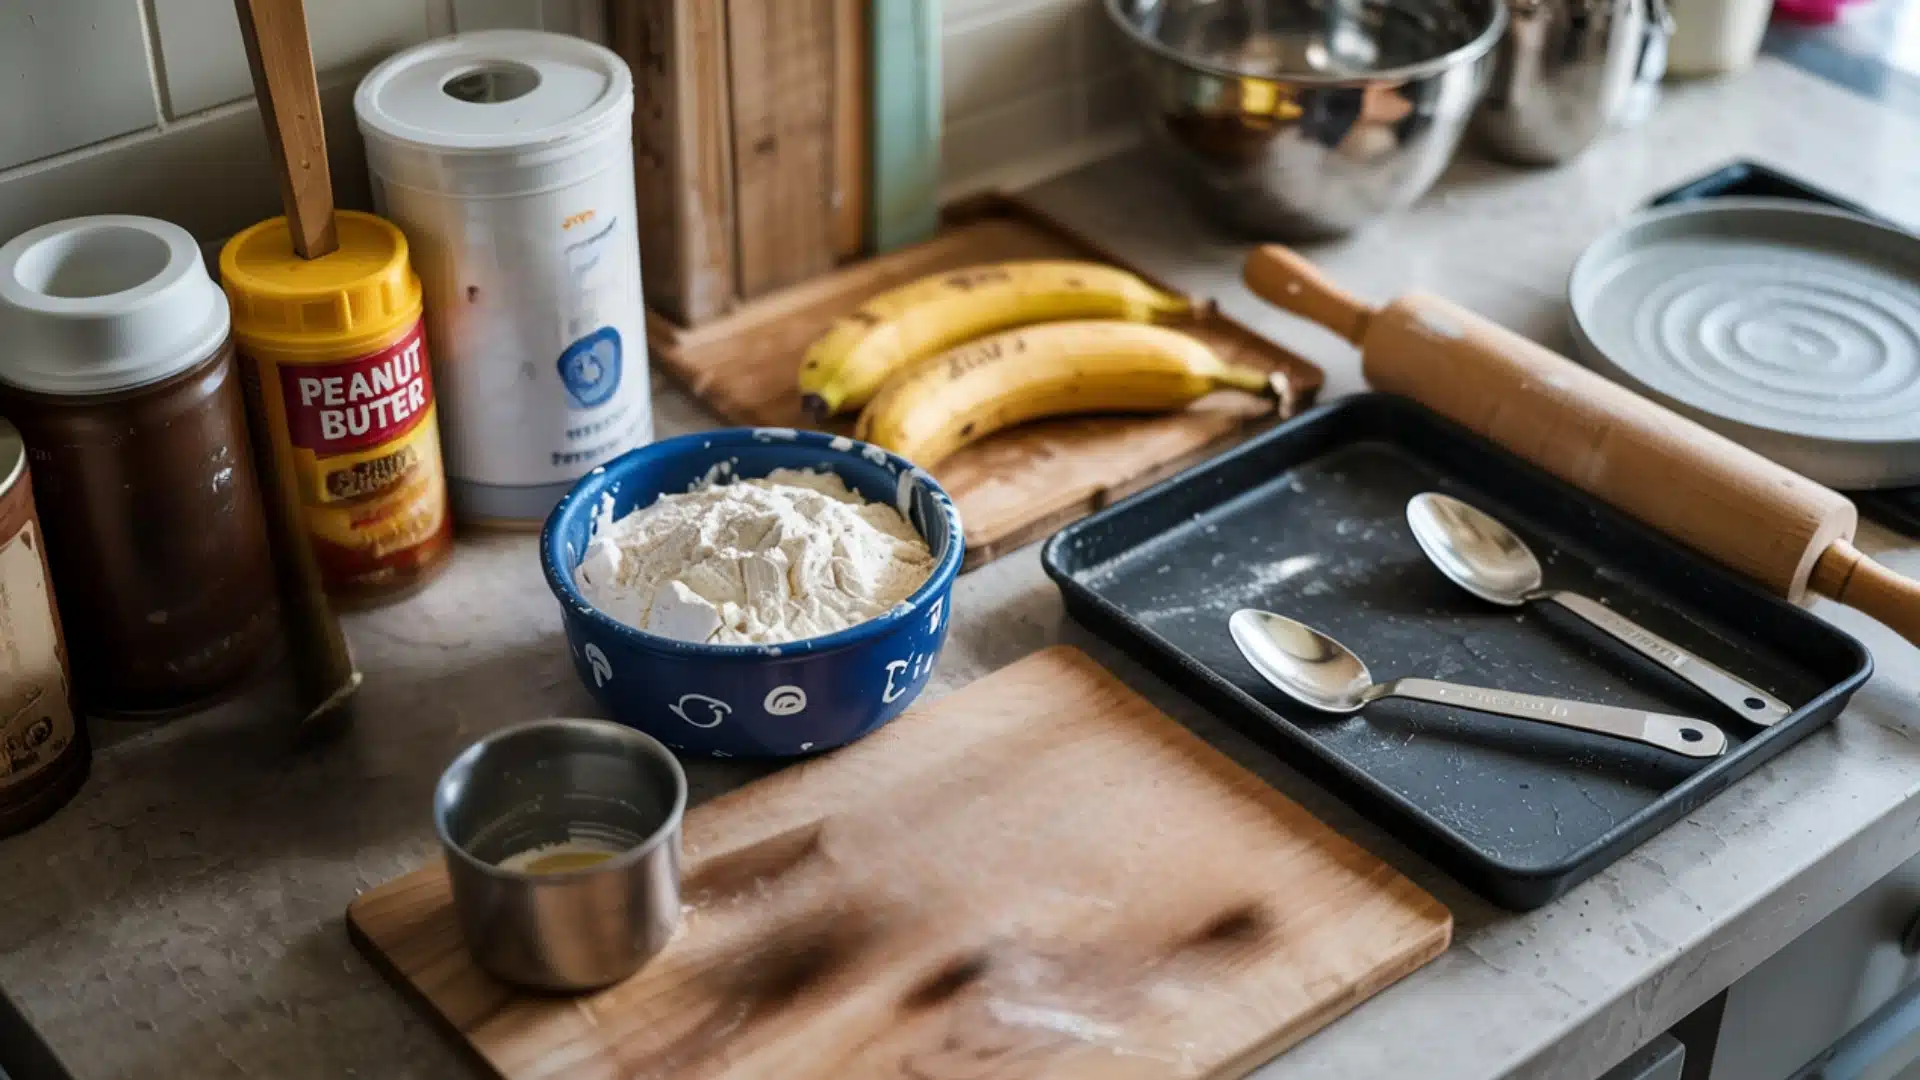
Prepping the best ingredients is the most crucial step, regardless of whether it’s just three simple ones.
Choosing fresh, natural ingredients ensures your dog gets the healthiest treats possible.
Ingredients
- Peanut Butter: Works as the main base, adding protein, healthy fats, and flavor that support your dog’s muscles and energy.
- Whole Wheat Flour or Ground Rolled Oats: Acts as the structure of the dough, preventing it from sticking while rolling or shaping.
- Banana/Pumpkin Puree/Sweet Potato: Choose one based on your goal; banana for natural sweetness, pumpkin for digestion and weight control, or sweet potato for extra energy, vitamins, and antioxidants.
Once your ingredients are ready, gather the right tools on your countertop to prepare for baking.
You can try Buddy Budder Ruff Ruff Raw Natural Peanut Butter, as its good and safe for dogs.
Tools
- Mixing Bowl: To combine all ingredients smoothly.
- Spoon or Spatula: To stir and scrape the dough.
- Rolling Board or Surface: To roll out the dough evenly.
- Rolling Pin: To flatten the dough into a uniform thickness.
- Bone-Shaped Cookie Cutter: To cut the dough into fun, dog-friendly shapes (available on Walmart, Amazon, or local shops).
- Baking Sheet: To hold your shaped treats while baking.
- Parchment Paper or Silicone Baking Mat: To prevent sticking and make cleanup easy. (Consider buying Parchment Paper or Silicone Baking Mat)
- Airtight Container or Ziplock Bags: To keep your baked treats fresh and crunchy.
Now that you’ve got all your ingredients and tools ready, it’s time to start cooking and make those tasty peanut butter dog treats.
Step-by-Step Guide to Making Peanut Butter Dog Treats
Making these treats is simple and fun, and each step ensures your dog gets a healthy, delicious snack made with love. Follow these steps carefully for the best results.
Step 1: Preheat the Oven

Start by preheating your oven to 350°F (177 °C).
Warming the oven in advance helps them bake evenly and achieve a nice texture. Ensure the rack is positioned in the center for consistent heating.
Preparing your oven early saves time and ensures every batch comes out golden brown and perfectly crisp.
Step 2: Mix Wet Ingredients
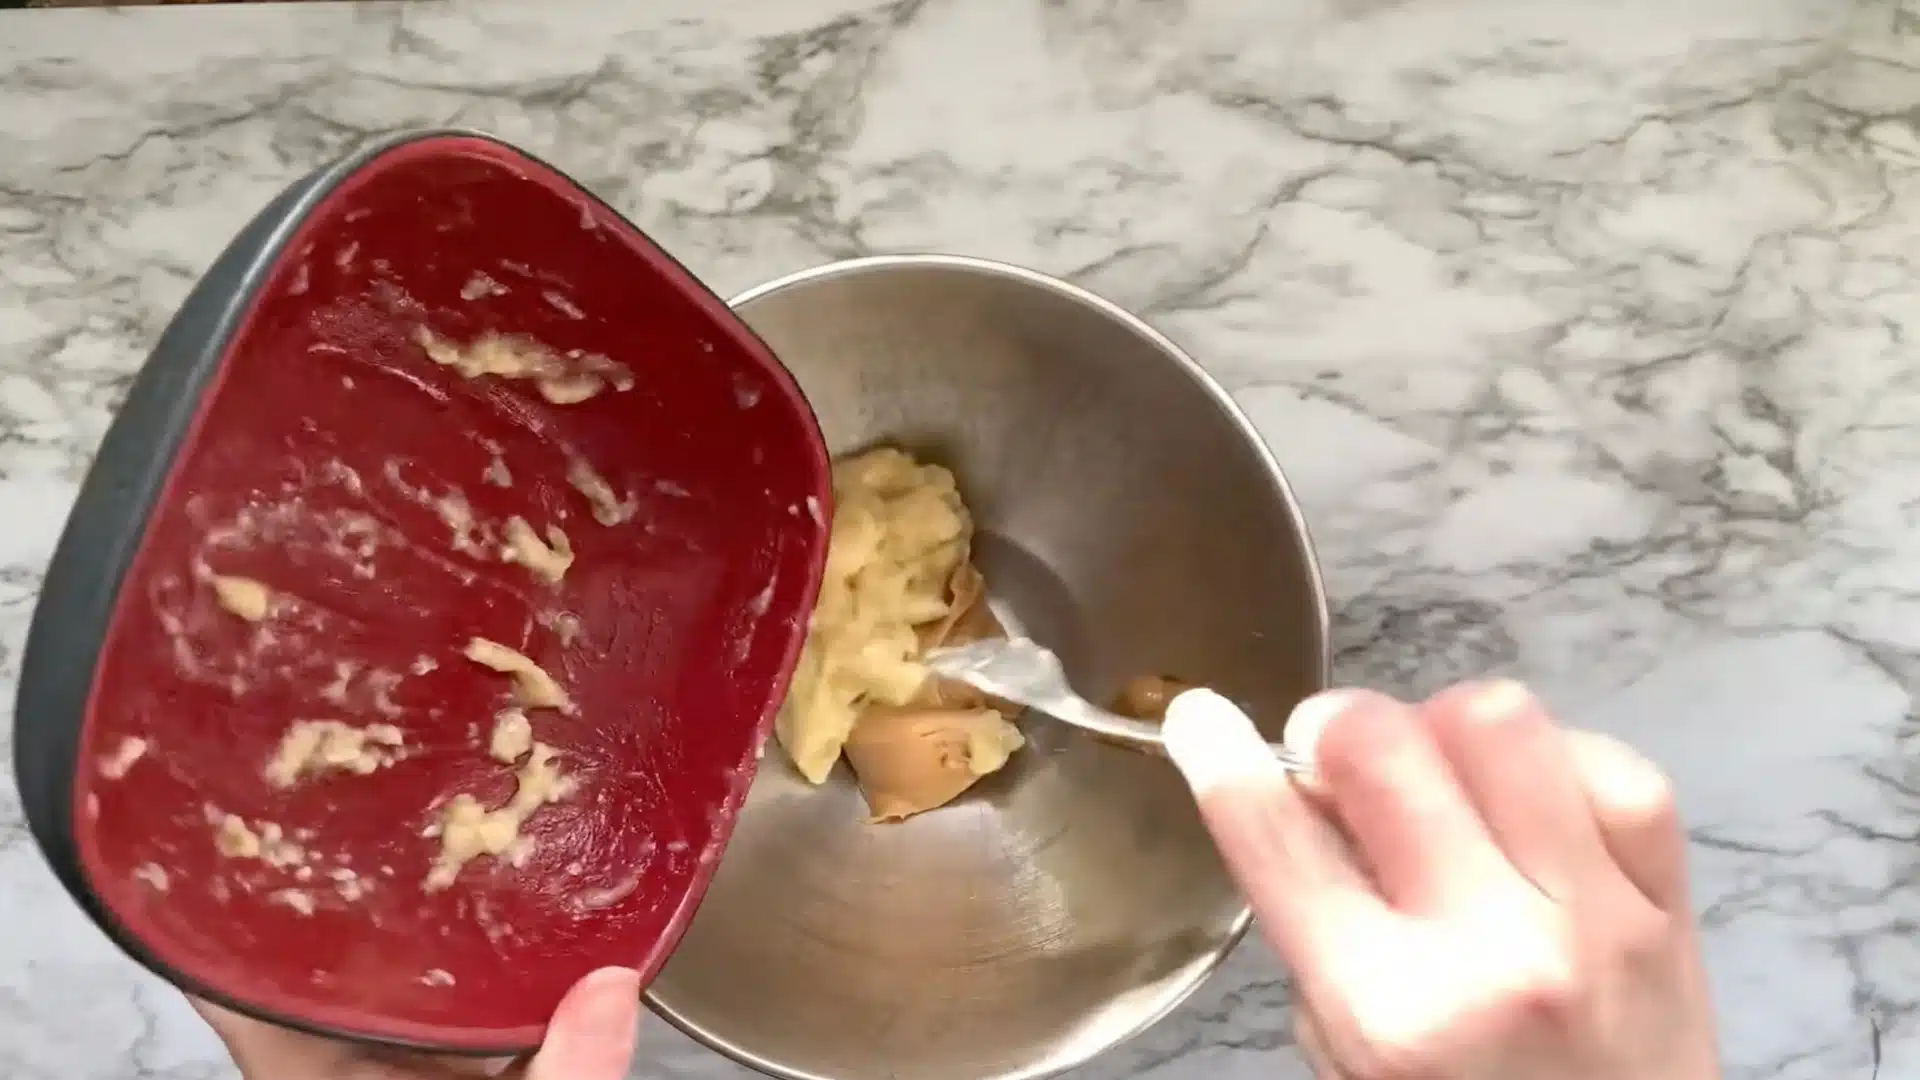
In a large mixing bowl, combine peanut butter with your chosen fruit or vegetable, such as mashed banana, pumpkin puree, or sweet potato.
Mix them thoroughly until the texture is smooth and creamy.
This step helps blend moisture and flavor evenly. A well-mixed base ensures your treats have balanced taste and consistent quality in every bite your dog enjoys.
Step 3: Add Flour to Form the Dough
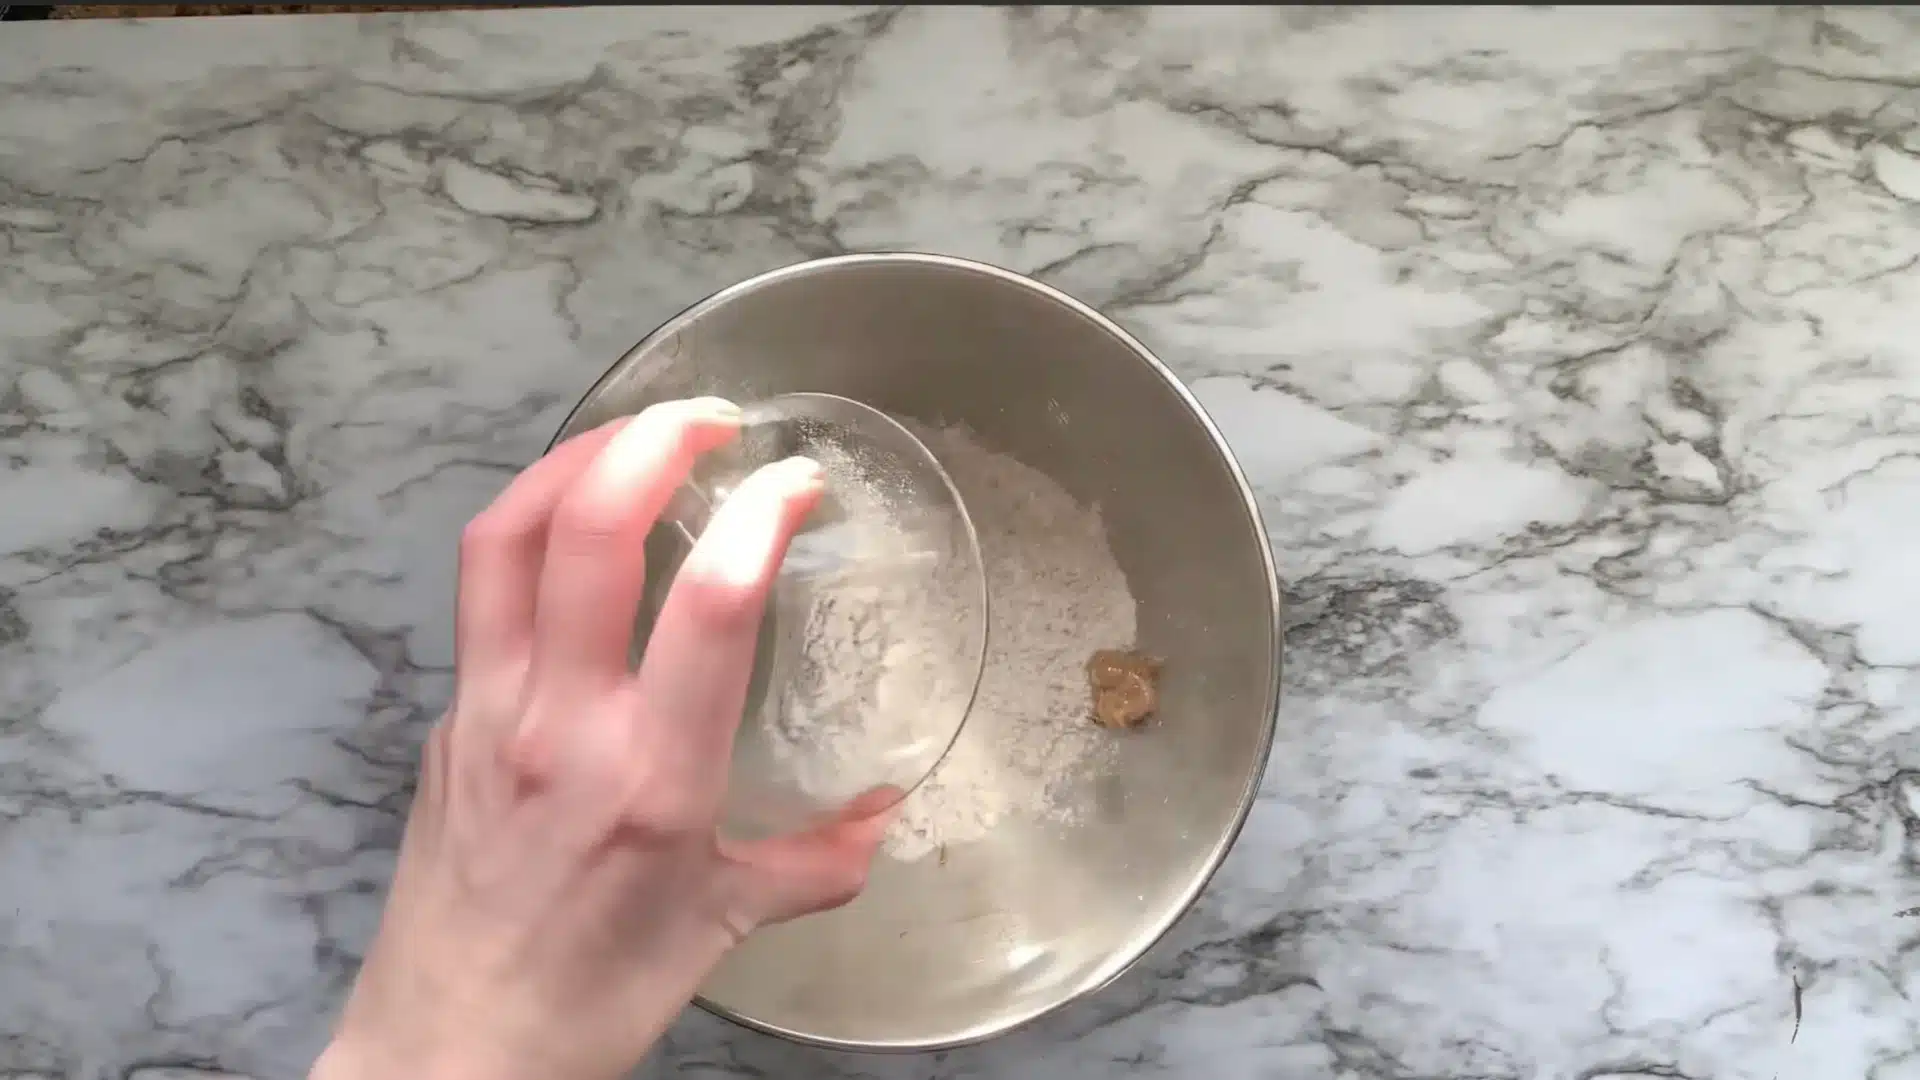
Slowly add whole wheat flour or ground rolled oats into the wet mixture.
Stir gradually until the dough forms and becomes soft but not sticky. Adjust flour slightly if it feels too wet. This helps you get the perfect consistency for rolling later.
Proper mixing at this stage gives your treats the right structure and even baking texture.
Step 4: Roll and Cut the Dough
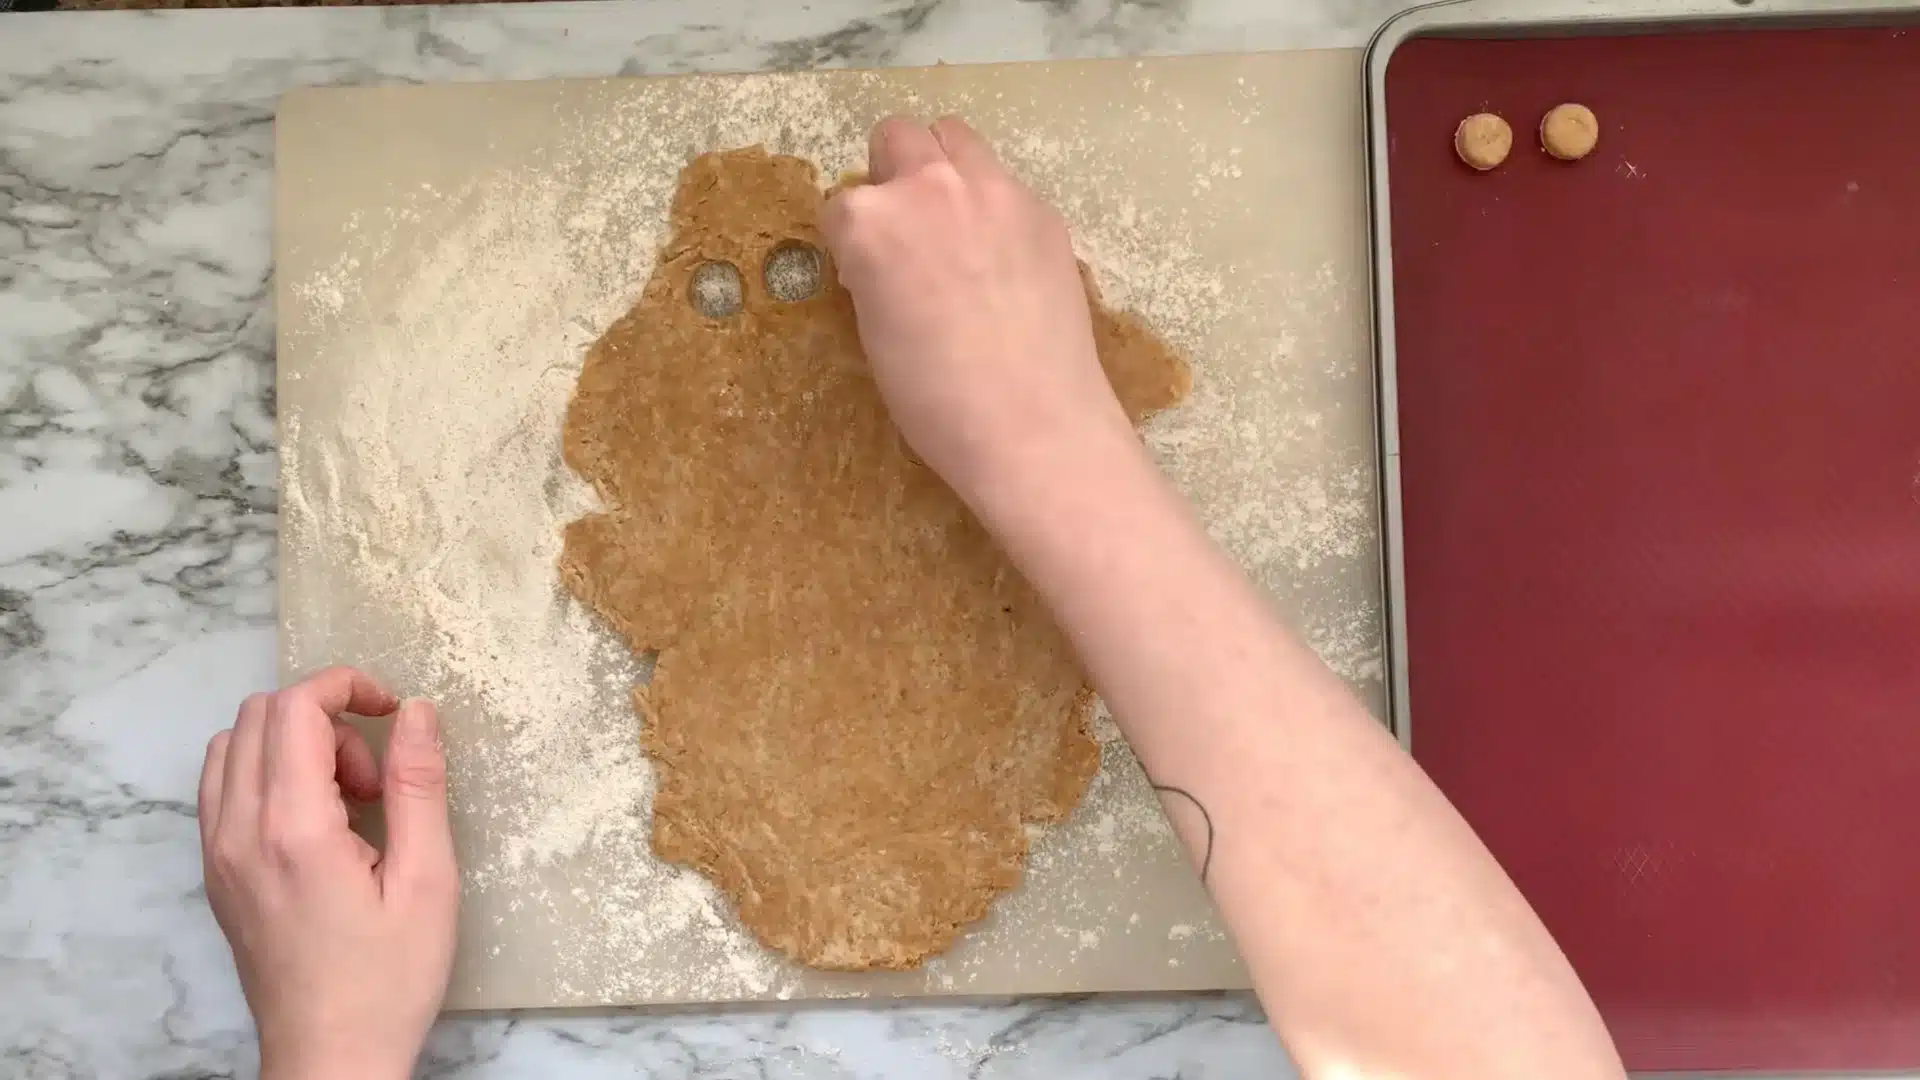
Sprinkle a bit of flour on your rolling surface to prevent sticking. Then, roll out the dough to about a quarter-inch thickness using a rolling pin.
In the video, you may notice the dough is cut into round shapes, but you can make it in any design you like.
A bone-shaped cookie cutter is recommended, as dogs are naturally drawn to objects in the shape of bones. Gather the leftover dough, roll it out again, and repeat the process until all the dough is used.
Consistent thickness helps your treats bake evenly without burning or undercooking.
Step 5: Bake the Treats
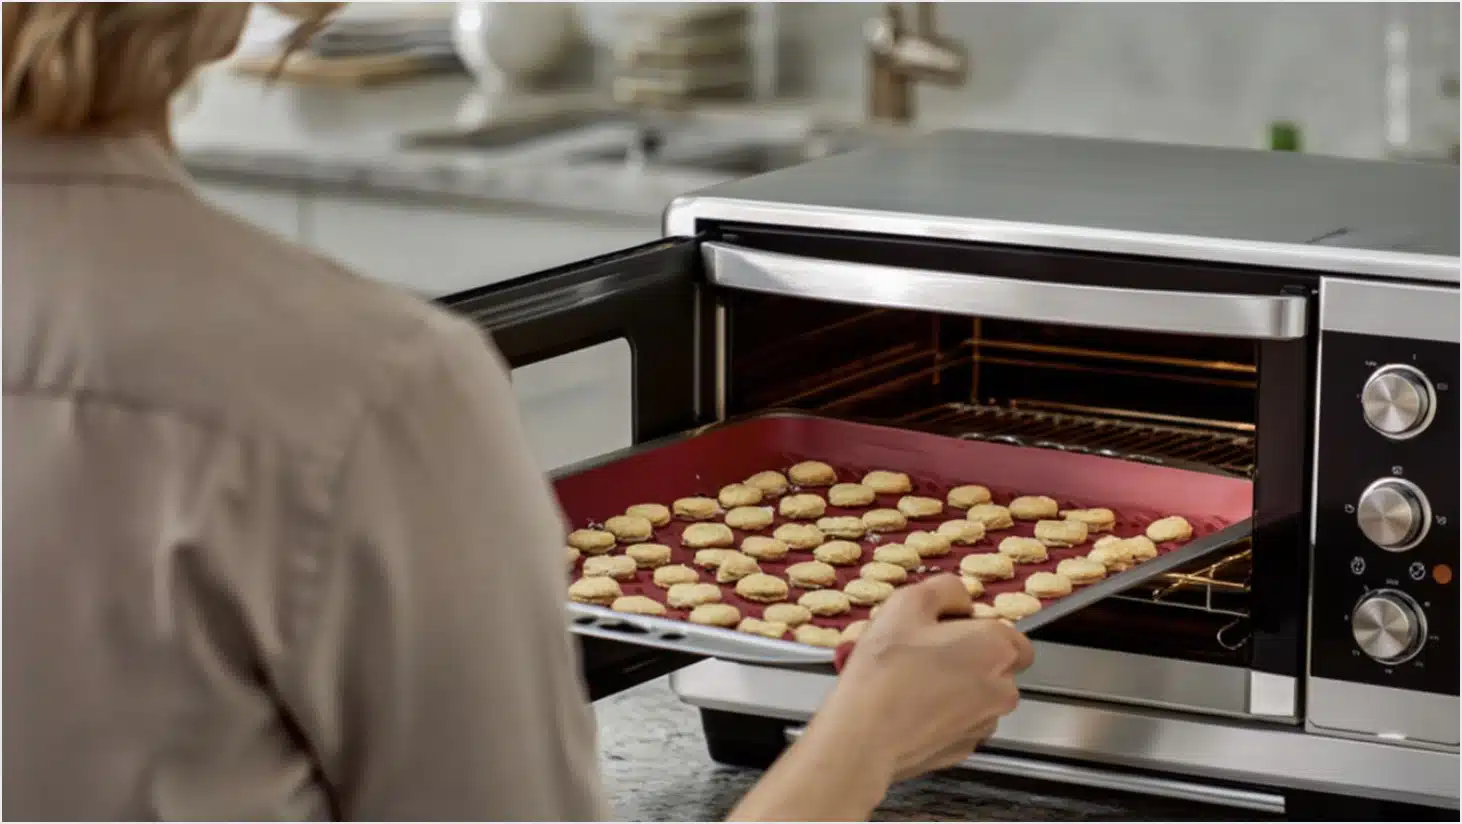
Place the shaped dough pieces evenly on a lined baking sheet.
Bake them for approximately 20 minutes, or until the edges turn golden brown. Keep an eye on them during the last few minutes to avoid overbaking.
This step locks in the flavor and crunch that dogs love, making each treat delicious and nutritious.
Step 6: Cool and Store

Once baked, let the treats cool completely on a wire rack.
Cooling prevents moisture buildup, keeping the treats crisp and fresh. Store them in an airtight container or ziplock bag to maintain freshness.
Store them at room temperature for a few days or refrigerate for longer storage. Proper storage ensures your dog’s treats stay safe and tasty.
For a more detailed and hands-on visual guide, watch the tutorial by K9 Kitchn, where every step, from mixing to baking, is clearly visible for perfect results.
Why Is It Better to DIY Rather Than Buy Them?
Making your own dog treats at home gives you complete control over what your furry friend eats.
You can choose natural, safe ingredients and avoid unnecessary additives, salt, sugar, or preservatives that are often found in packaged treats.
Homemade treats are not only healthier but also much fresher and more affordable, costing just a few cents per piece compared to expensive store-bought versions.
You can easily customize them for your dog’s specific taste, size, or dietary needs, making them a perfect personalized reward.
The process of baking at home also creates a fun and relaxing experience for you while strengthening your connection with your pet.
Each batch you make reflects care, love, and trust, ensuring your dog enjoys snacks made from ingredients you truly believe in.
How and When to Serve Dog Treats?
Dog treats are wonderful rewards that make training, playtime, and bonding more enjoyable.
The best time to serve treats is during training sessions, after good behavior, or as a small snack between meals.
Always remember that treats are extras, not meal replacements, and should make up no more than 10% of your dog’s daily calories.
Give them after your dog eats its main meal to avoid overeating and digestive upset. Offering smaller portions frequently helps maintain a healthy weight and prevents nutritional imbalance.
You can also use treats during enrichment activities, like puzzle toys, to keep your dog mentally stimulated. Every time you hand out a treat, ensure it’s given as part of positive reinforcement.
This consistent approach builds trust, strengthens your bond, and keeps your pet motivated and happy every single day.
Safety Tips While Cooking Dog Treats

Making dog treats at home is safe when you follow the right precautions. Keep these important tips in mind while cooking.
- Use Dog-Safe Ingredients: Never use xylitol, artificial sweeteners, or excessive salt, as they can harm your dog’s health.
- Choose Natural Peanut Butter: Always use unsalted, xylitol-free peanut butter to ensure safety and nutrition.
- Introduce Slowly: Offer new treats gradually to check for allergic reactions or stomach sensitivity.
- Control Portions: Follow the 10% calorie rule so treats don’t exceed ten percent of your dog’s daily calorie intake.
- Store Properly: Keep baked treats in airtight containers to maintain freshness and prevent mold growth.
- Consult a Veterinarian: If your dog has special health conditions, discuss new treat recipes with your vet first.
By following these simple tips, you’ll keep your homemade dog treats safe, tasty, and healthy for your furry friend every time you bake.
Conclusion
Making your own dog treats at home is truly one of the simplest and most rewarding things you can do for your furry friend.
With just 3 ingredients, you can create wholesome, nutritious snacks that keep your dog happy and healthy without spending much money.
These treats are cost-effective, easy to make, and can be customized to suit your dog’s taste and dietary needs.
You can use them for training, rewarding, or just showing a little extra love. Watching your dog enjoy something you made with your own hands brings real joy and strengthens your bond.
So grab your ingredients, start baking, and make your dog’s tail wag with excitement.
Do prepare your treats and show how they look. We would love to see your creations in the comments below.